Columbus
Circle, Steamboat Springs & the Queens Museum.
When computers began to be used in architectural offices,
they were unstable and relatively primitive. I lived through that period of
frustration, elation and work-a-rounds. This
is just one of a number of posts I want to write about it – partly, just to
leave a record of the work, but mainly as an example of mixing the digital with
the hand.
In the early 1980s 3D computer modeling was not an option in
architectural offices. Just buying a computer with the requisite memory and
graphics was way too expensive. But in 1985 the office in which I worked bought
an early CAD computer and a very early version of AutoCad, which was used for
Building Department submission drawings. Simple diagramatic drawings were created,
with much computer crashing and gnashing of teeth. The simplest 3D modeling was a faint glimmer
in the recesses of that early software.

The layout above was done for the Columbus Circle
Competition in 1985. The red curves show where I used a print out of circles in
perspective from that early CAD computer. Without those print outs, the
semicircular façade of the proposed building would have been a frustrating job
of sketching and re-sketching. With a large plot of these curves the layout was
not much harder than a run-of-the-mill hand layout.

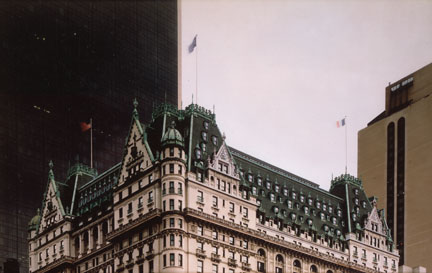
In 1987 I bought my own CAD computer, and played with it
whenever I could find the time. I spent my nights working on small rendering
jobs, and very occasionally I found that I could use the (at that time) primitive
AutoCad program to help speed my work. The sketch above mixed a photo of an
existing building with a CAD view of rotated cubes and some hand layout work.

This interior view of the same job used a crude wireframe of
the ceiling and floor (now lost), and hand layout work. The computer made the
curved lattice and joints easy. In both drawings the paste-up layout was made
uniform by redrawing it using ink on mylar.

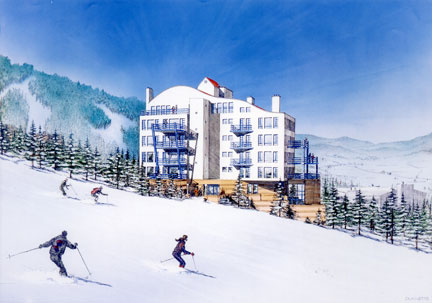
Another project that used complex curves was a ski resort
condominium in Steamboat Springs. In general, the building could have been
worked out via hand or computer, but the ski-slope-like roof posed a problem.

By limiting the model to the visible walls I only needed to
construct a few 3D “faces” for balconies and railings. I worked out shade and
shadow on a letter sized printout, and used that as the center of a hand drawn
setting in the ski resort area.

A pencil sketch of the final was Xeroxed and worked over
with pastel…

…and a more finished sketch was tried over the ink final.
The final art was finished with airbrushed transparent ink
on a photographic copy of the ink drawing.
___________________
Early in 1989 I had the chance to do a rendering of the
renovation of the Queens Museum, on the site of the many World’s Fairs that
were hosted by New York City. Built for
the 1939 Fair, and used as the home of the United Nations from 1946 to 1950,
the museum is now a venue for arts and educational programs, as well as being
the permanent location for the “Panorama of the City of New York”.

The renovation architect was Rafael Vignoly, who has since gone
on to much bigger projects. It happened that he had organized a small 3D CAD
group in his office, and they produced the wireframe that I used. You can see
the actual wireframe lines (created on a “pin printer”) to the right of the
pastel sketch.

Another pastel and pencil sketch exploring a brighter
approach. The lines of the building in the reflecting pool were created by
copying the building as a “block”, and placing the copy upside down directly
below the building itself. The plaza layers were turned off, and a print made
of the museum and its mirror below. It was then cut into the rest of the image,
producing a “reflection” in the water of the pool.

The final layout was printed full size, and then reproduced
on photographic paper. I airbrushed opaque white over the entire image to grey
out the black lines. Then I masked and airbrushed each area with black India
ink, starting with the sky. Streaked areas in the reflecting pool were produced
by erasing back the airbrushed ink (a technique that worked well with some
inks, but not with others).
Next: the Tokyo International Forum.